Arduino Project 023D - Liquid Crystal Displays - Custom Character
Before wiring the LCD screen to your Arduino board we suggest to solder a pin header strip to the 14 (or 16) pin count connector of the LCD screen, as you can see in the image further up.
To start with, you will create a demonstration project that will show off most of the functions available in the LiquidCrystal.h library. To do so, you’ll use a backlit 16x2 LCD Display.
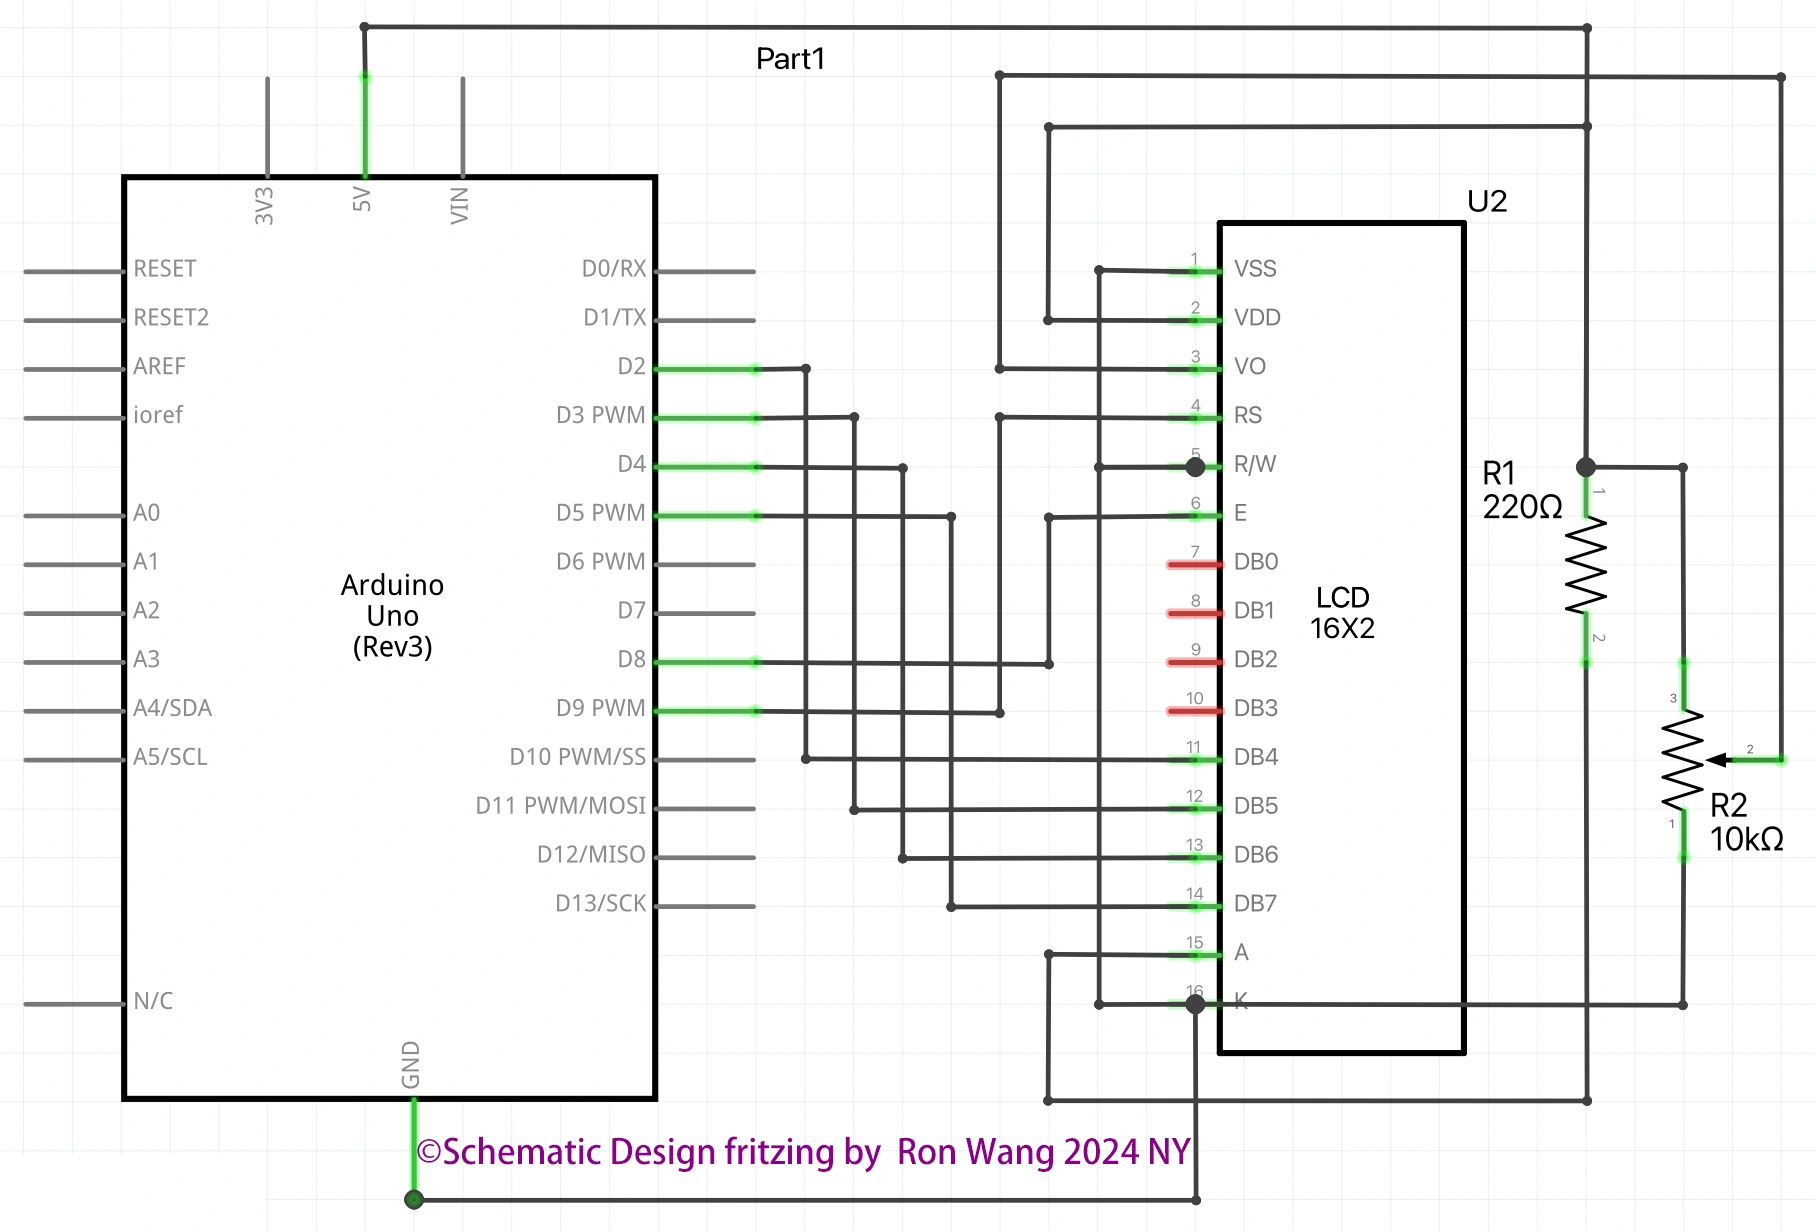
To wire your LCD screen to your board, connect the following pins:
LCD RS pin to digital pin 9
LCD Enable pin to digital pin 8
LCD D4 pin to digital pin 5
LCD D5 pin to digital pin 4
LCD D6 pin to digital pin 3
LCD D7 pin to digital pin 2
LCD R/W pin to GND
LCD VSS pin to GND
LCD VCC pin to 5V
LCD LED+ to 5V through a 220 ohm resistor
LCD LED- to GND
Project 23D Liquid Crystal Displays - Custom Character
/* Coding Ron Wang
   Nov.13th 2024
   Autaba support for coding hardware
   Project 23G Basic LCD Control- Display Custom Character "I love Arduino ! "
 */

#include <LiquidCrystal.h>
// Initialize the library with the numbers of the interface pins
const int rs = 9, en = 8, d4 = 5, d5 = 4, d6 = 3, d7 = 2;
LiquidCrystal lcd(rs, en, d4, d5, d6, d7);
// make some custom characters:
byte heart[8] = {
  0b00000,
  0b01010,
  0b11111,
  0b11111,
  0b11111,
  0b01110,
  0b00100,
  0b00000
};
byte smiley[8] = {
  0b00000,
  0b00000,
  0b01010,
  0b00000,
  0b00000,
  0b10001,
  0b01110,
  0b00000
};
byte frownie[8] = {
  0b00000,
  0b00000,
  0b01010,
  0b00000,
  0b00000,
  0b00000,
  0b01110,
  0b10001
};
byte armsDown[8] = {
  0b00100,
  0b01010,
  0b00100,
  0b00100,
  0b01110,
  0b10101,
  0b00100,
  0b01010
};
byte armsUp[8] = {
  0b00100,
  0b01010,
  0b00100,
  0b10101,
  0b01110,
  0b00100,
  0b00100,
  0b01010
};
void setup() {
  // initialize LCD and set up the number of columns and rows:
  lcd.begin(16, 2);
  // create a new character
  lcd.createChar(0, heart);
  // create a new character
  lcd.createChar(1, smiley);
  // create a new character
  lcd.createChar(2, frownie);
  // create a new character
  lcd.createChar(3, armsDown);
  // create a new character
  lcd.createChar(4, armsUp);
  // set the cursor to the top left
  lcd.setCursor(0, 0);
  // Print a message to the lcd.
  lcd.print("I ");
  lcd.write(byte(0)); // when calling lcd.write() '0' must be cast as a byte
  lcd.print(" Arduino! ");
  lcd.write((byte)1);
}
void loop() {
  // read the potentiometer on A0:
  int sensorReading = analogRead(A0);
  // map the result to 200 - 1000:
  int delayTime = map(sensorReading, 0, 1023, 200, 1000);
  // set the cursor to the bottom row, 5th position:
  lcd.setCursor(4, 1);
  // draw the little man, arms down:
  lcd.write(3);
  delay(delayTime);
  lcd.setCursor(4, 1);
  // draw him arms up:
  lcd.write(4);
  delay(delayTime);
}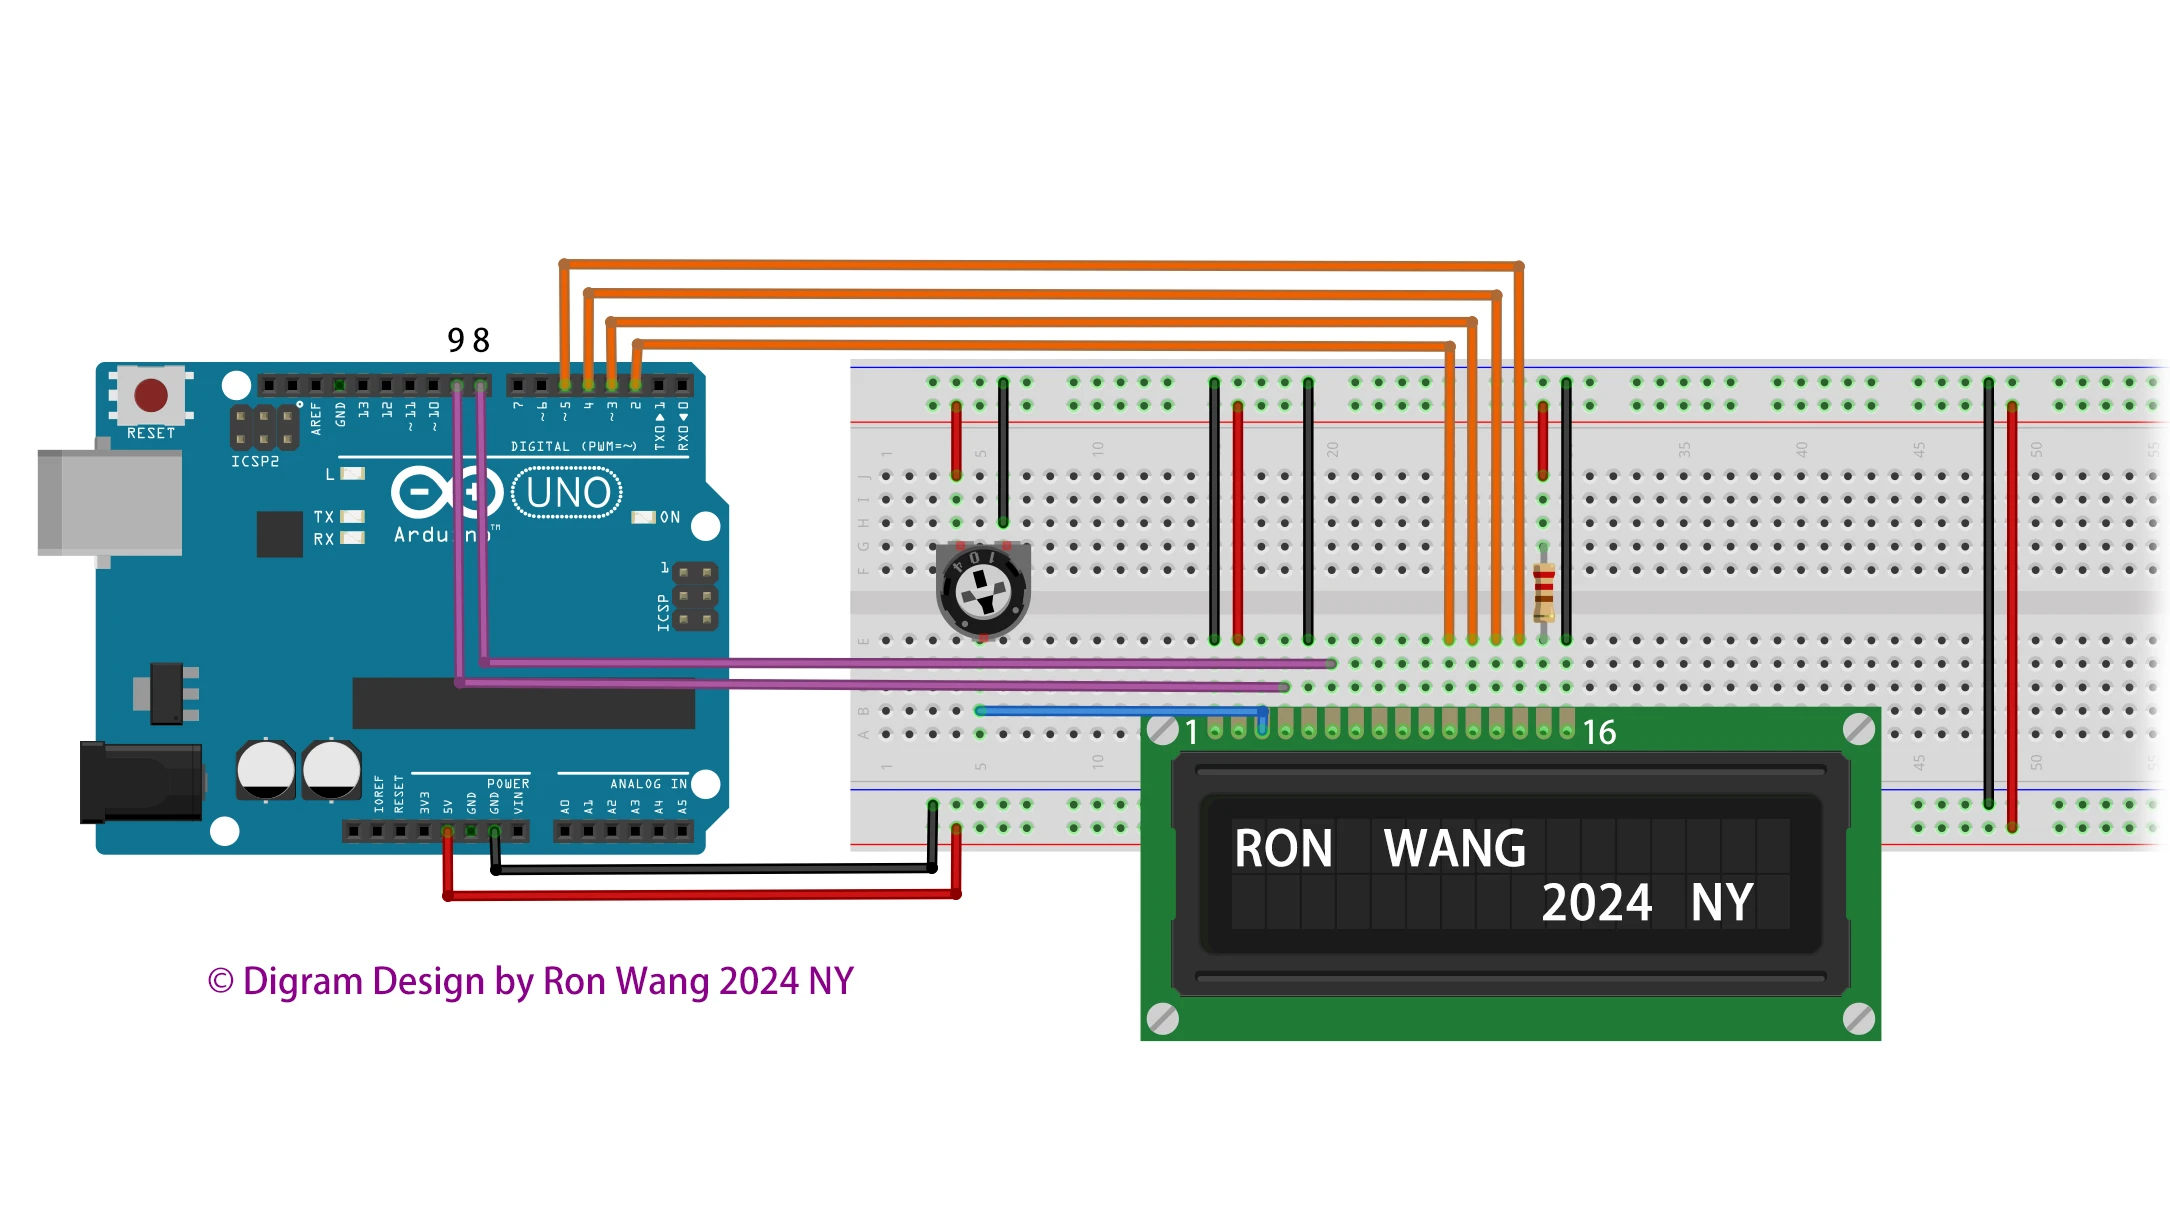
Additionally, wire a 10k potentiometer to +5V and GND, with it's wiper (output) to LCD screens VO pin (pin3).
版权声明:本文为原创文章,版权归donstudio所有,欢迎分享本文,转载请保留出处!


