Arduino Project 040 - Ultrasonic Distance Alarm
The sensor consists of two primary components: a transmitter and a receiver . The transmitter is responsible for emitting a high-frequency sound. In essence, ultrasonic refers to frequencies beyond the range of the human hearing - so something higher than 20kHz.
When the sound wave hits an object, it bounces back like echo. This returning wave is detected by the receiver. The sensor will use the micro-controller (Arduino) internal clock to find out how much it took for the sound to bounce back. This small clock turns on when a high-frequency wave is emitted and turns off when its echo is detected.
Using code, we can write a program that will store the timing between those two events into a variable. Then, we can use this information to calculate the distance between the sensor and the object.
You may be thinking: how can we find the distance if all we know is the timing?
Well, as you know, velocity is distance divided by time. Based on this equation, if we multiply the velocity by the time, we'll find the distance . I told you the sensor emits sound waves, so the velocity we need is the speed of sound in air (340 m/s).
Velocity = Distance / Time
Distance = Velocity * Time
But if we multiply this speed with the timing we found, we'll discover a value that's twice the real distance. That's happens because the sound hit the object and came back, in other words, it traveled the same path twice. Then to find the real distance, multiply the speed of sound with the timing and divide the result by two.
Distance = (Velocity * Time) / 2
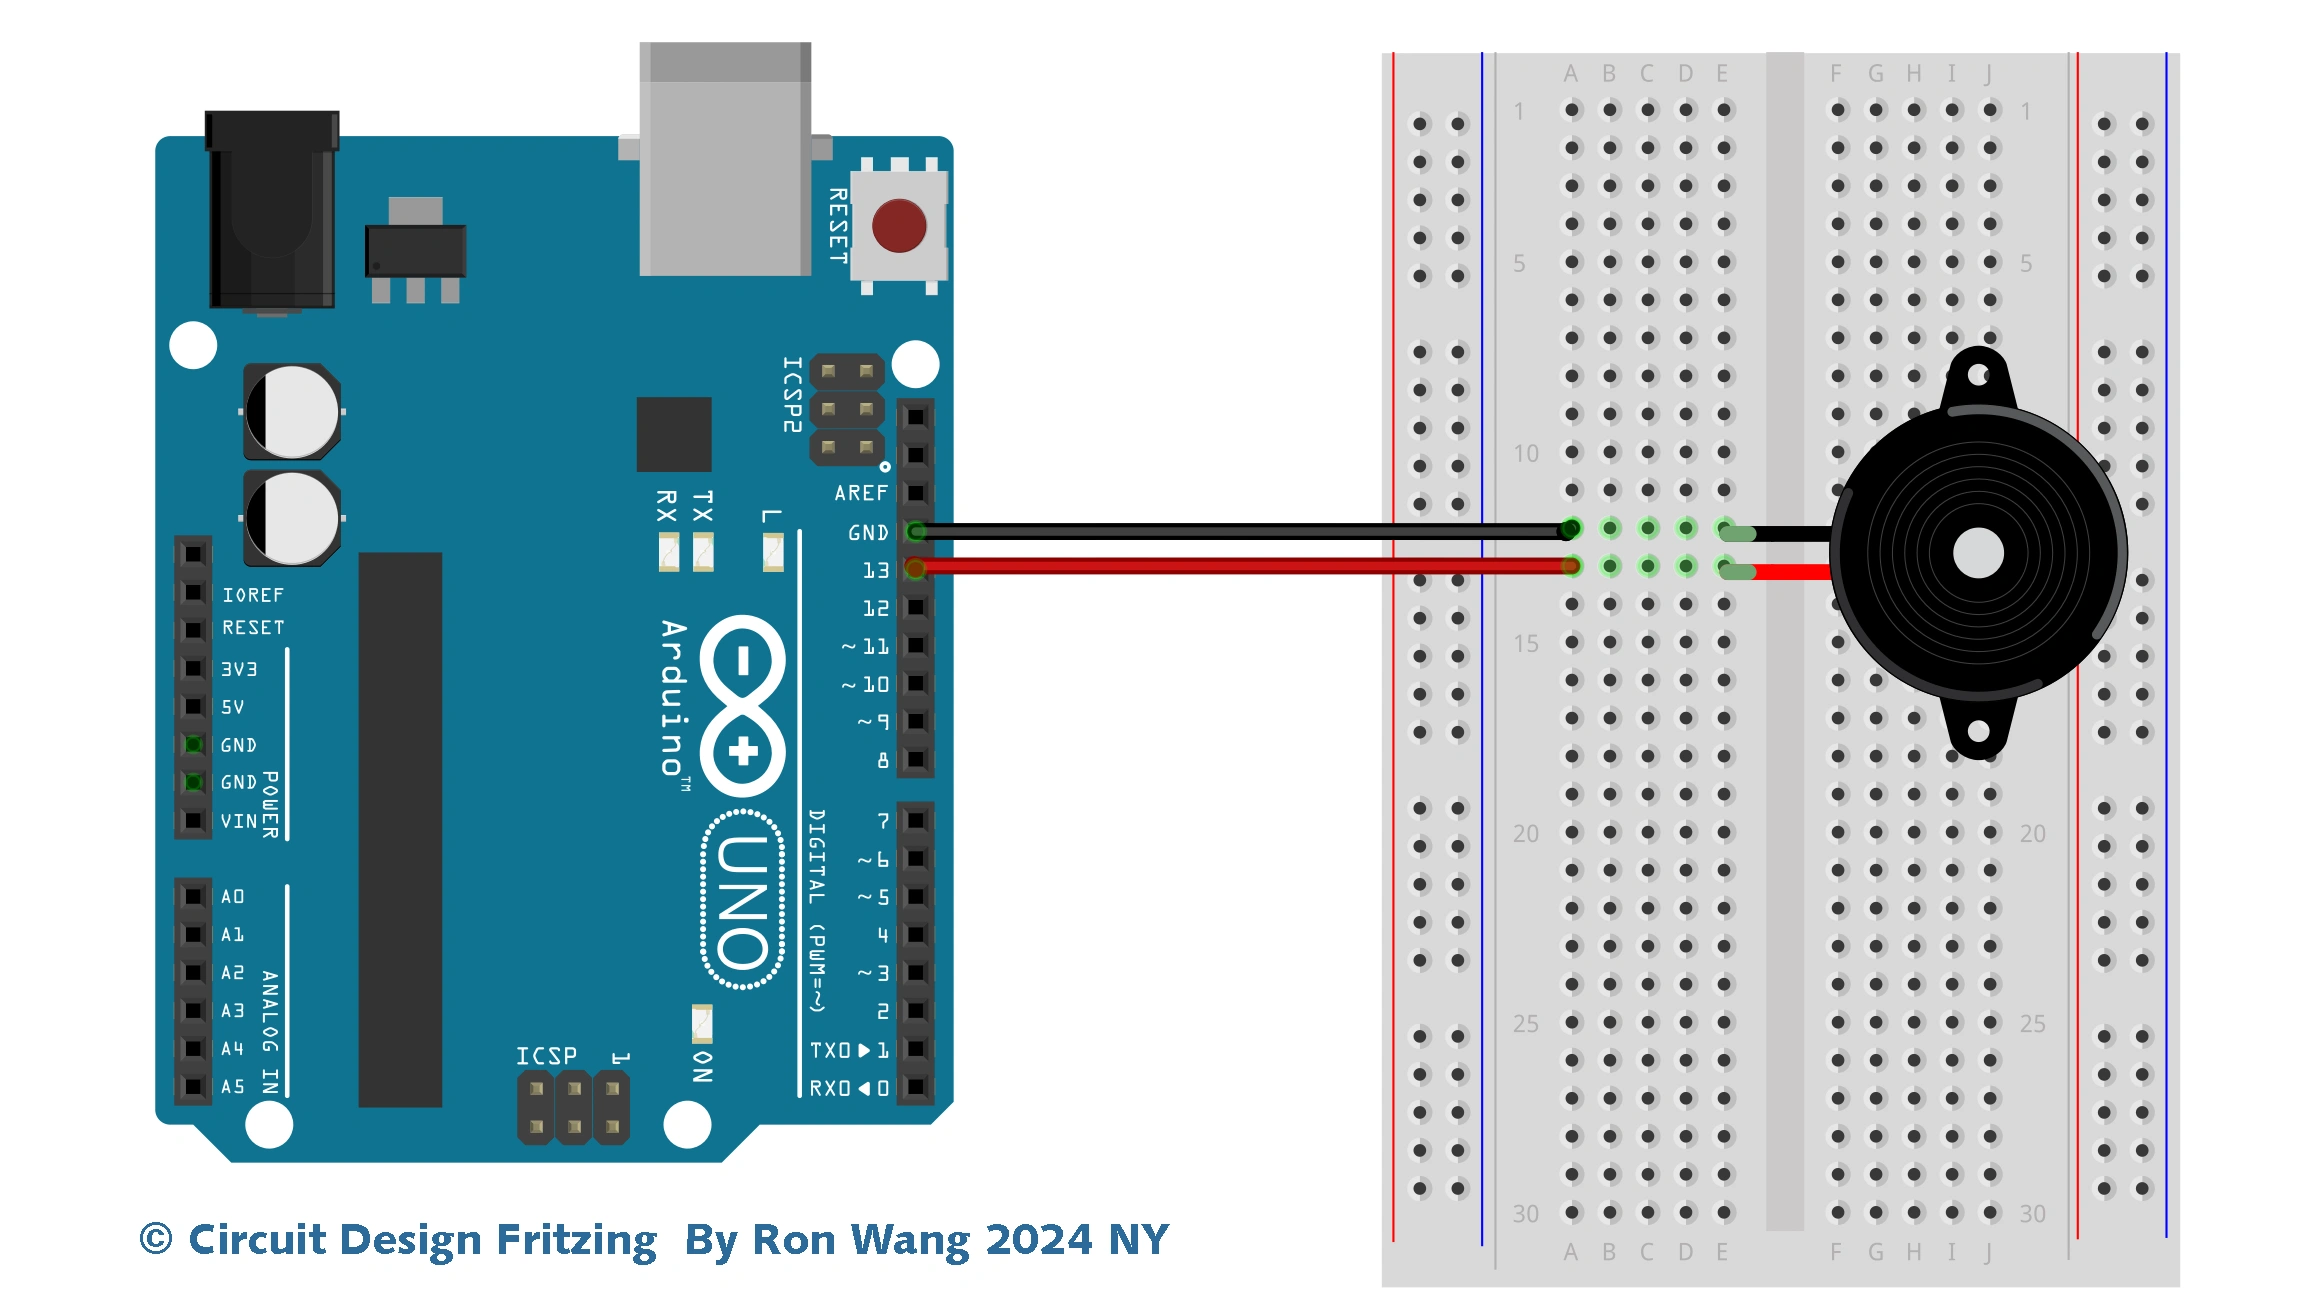
Firstly, attach the ultrasonic sensor and the buzzer on the breadboard. Then connect the VCC and GND pins on Arduino 5V and ground ports.
After that connect the trigger pin to port 9, the echo pin to port 10, and the buzzer to port 8. Also attach the buzzer GND to Arduino GND.


/* Coding Ron Wang
   Dec.5th 2024
   Autaba support for coding hardware
   Project 40 Ultrasonic Alarm
 */
const int buzzer = 8;
const int trig_pin = 3;
const int echo_pin = 2;
float timing = 0.0;
float distance = 0.0;
void setup()
{
  pinMode(echo_pin, INPUT);
  pinMode(trig_pin, OUTPUT);
  pinMode(buzzer, OUTPUT);
  digitalWrite(trig_pin, LOW);
  digitalWrite(buzzer, LOW);
  Serial.begin(9600);
}
void loop()
{
  digitalWrite(trig_pin, LOW);
  delay(2);
  digitalWrite(trig_pin, HIGH);
  delay(10);
  digitalWrite(trig_pin, LOW);
  timing = pulseIn(echo_pin, HIGH);
  distance = (timing * 0.034) / 2;
  Serial.print("Distance: ");
  Serial.print(distance);
  Serial.print("cm | ");
  Serial.print(distance / 2.54);
  Serial.println("in");
  if (distance <= 50) {
  tone(buzzer, 500);
  } else {
  noTone(buzzer);
  }
   delay(100);
}版权声明:本文为原创文章,版权归donstudio所有,欢迎分享本文,转载请保留出处!