Arduino Project 039 - Ultrasonic Distance Display
Ultrasonic sensors measure distance by sending and receiving the ultrasonic wave. The ultrasonic sensor has a sender to emit the ultrasonic waves and a receiver to receive the ultrasonic waves. The transmitted ultrasonic wave travels through the air and is reflected by hitting the Object. Arduino calculates the time taken by the ultrasonic pulse wave to reach the receiver from the sender.
Ultrasonic sensor and technology informatio link : Arduino Project 038 - Simple Ultrasonic Range HC-SR04
In the code, the “duration” variable stores the time taken by the sound wave traveling from the emitter to the receiver. That is double the time to reach the object, whereas the sensor returns the total time including sender to object and object to receiver. Then, the time taken to reach the object is half of the time taken to reach the receiver.
Liquide crystal display coding , circuit and Schematic detail you can link : Arduino Project 023 - Liquid Crystal Displays - Hello World!!!
Project 39-- Ultrasonic Distance Display


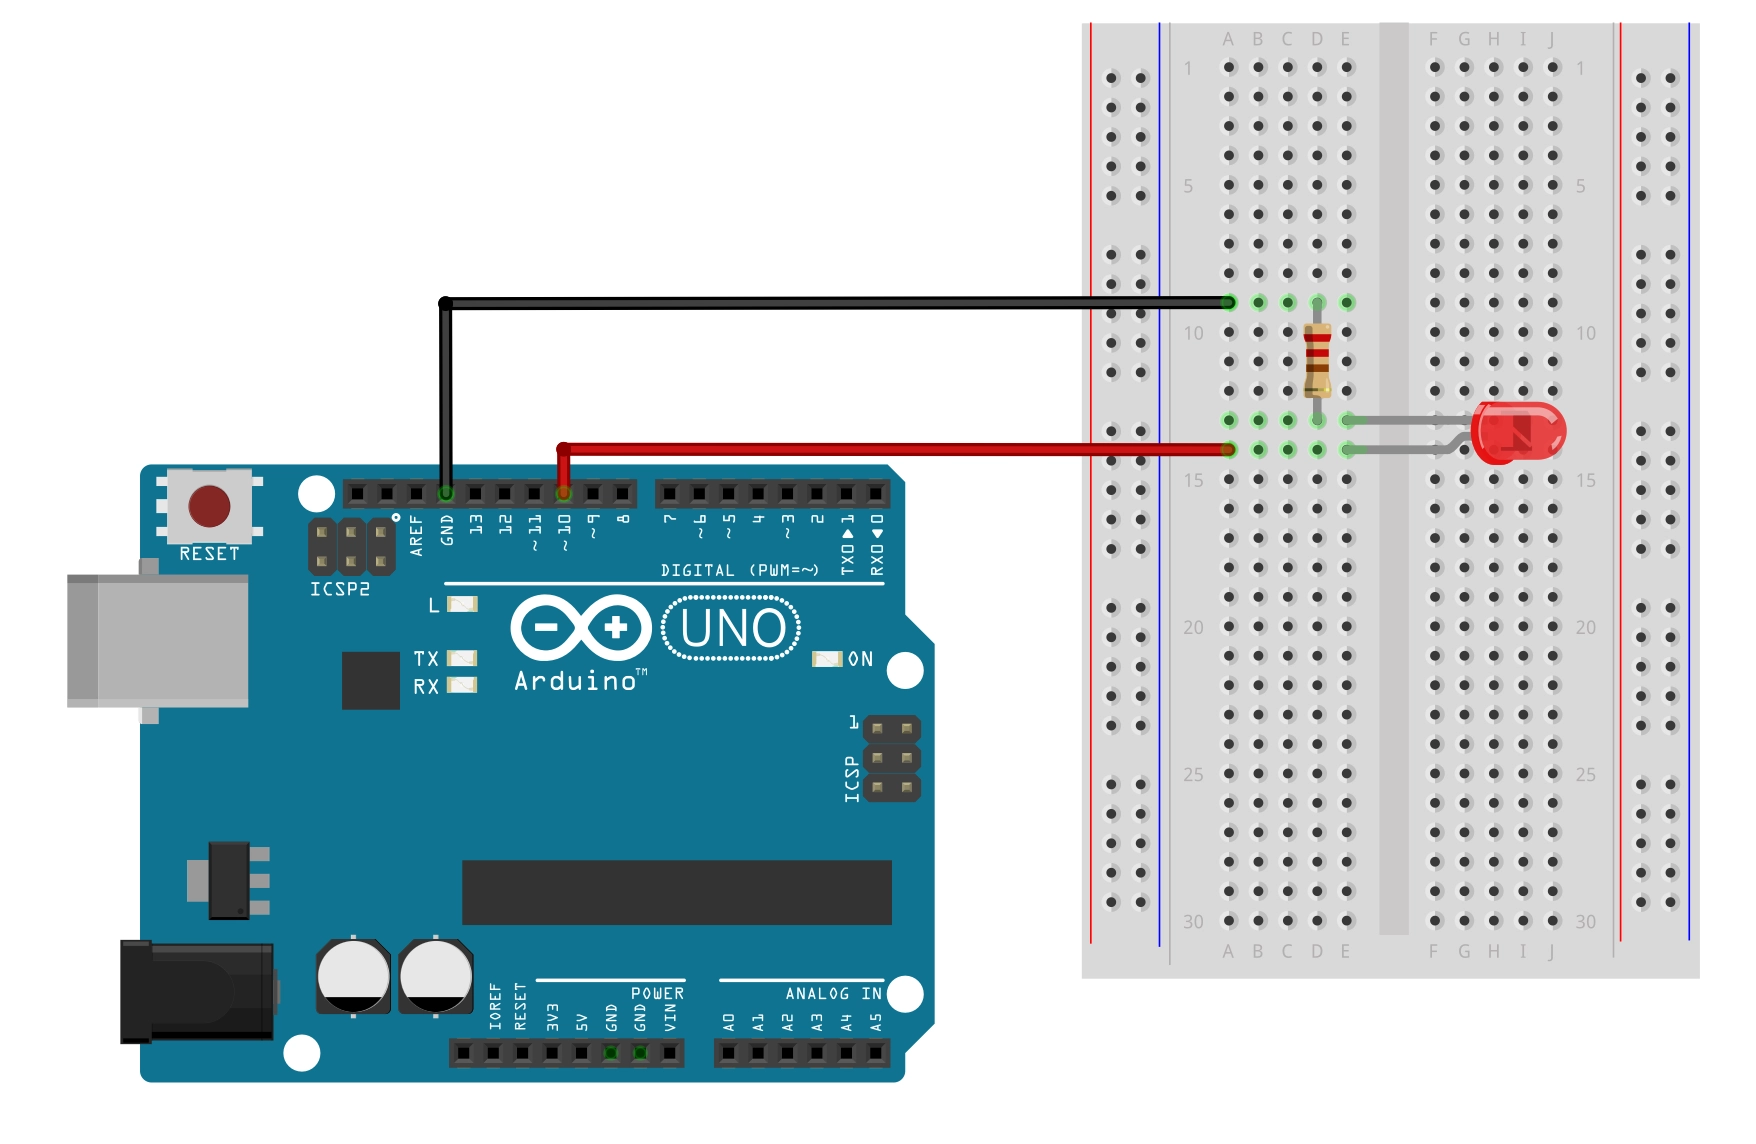
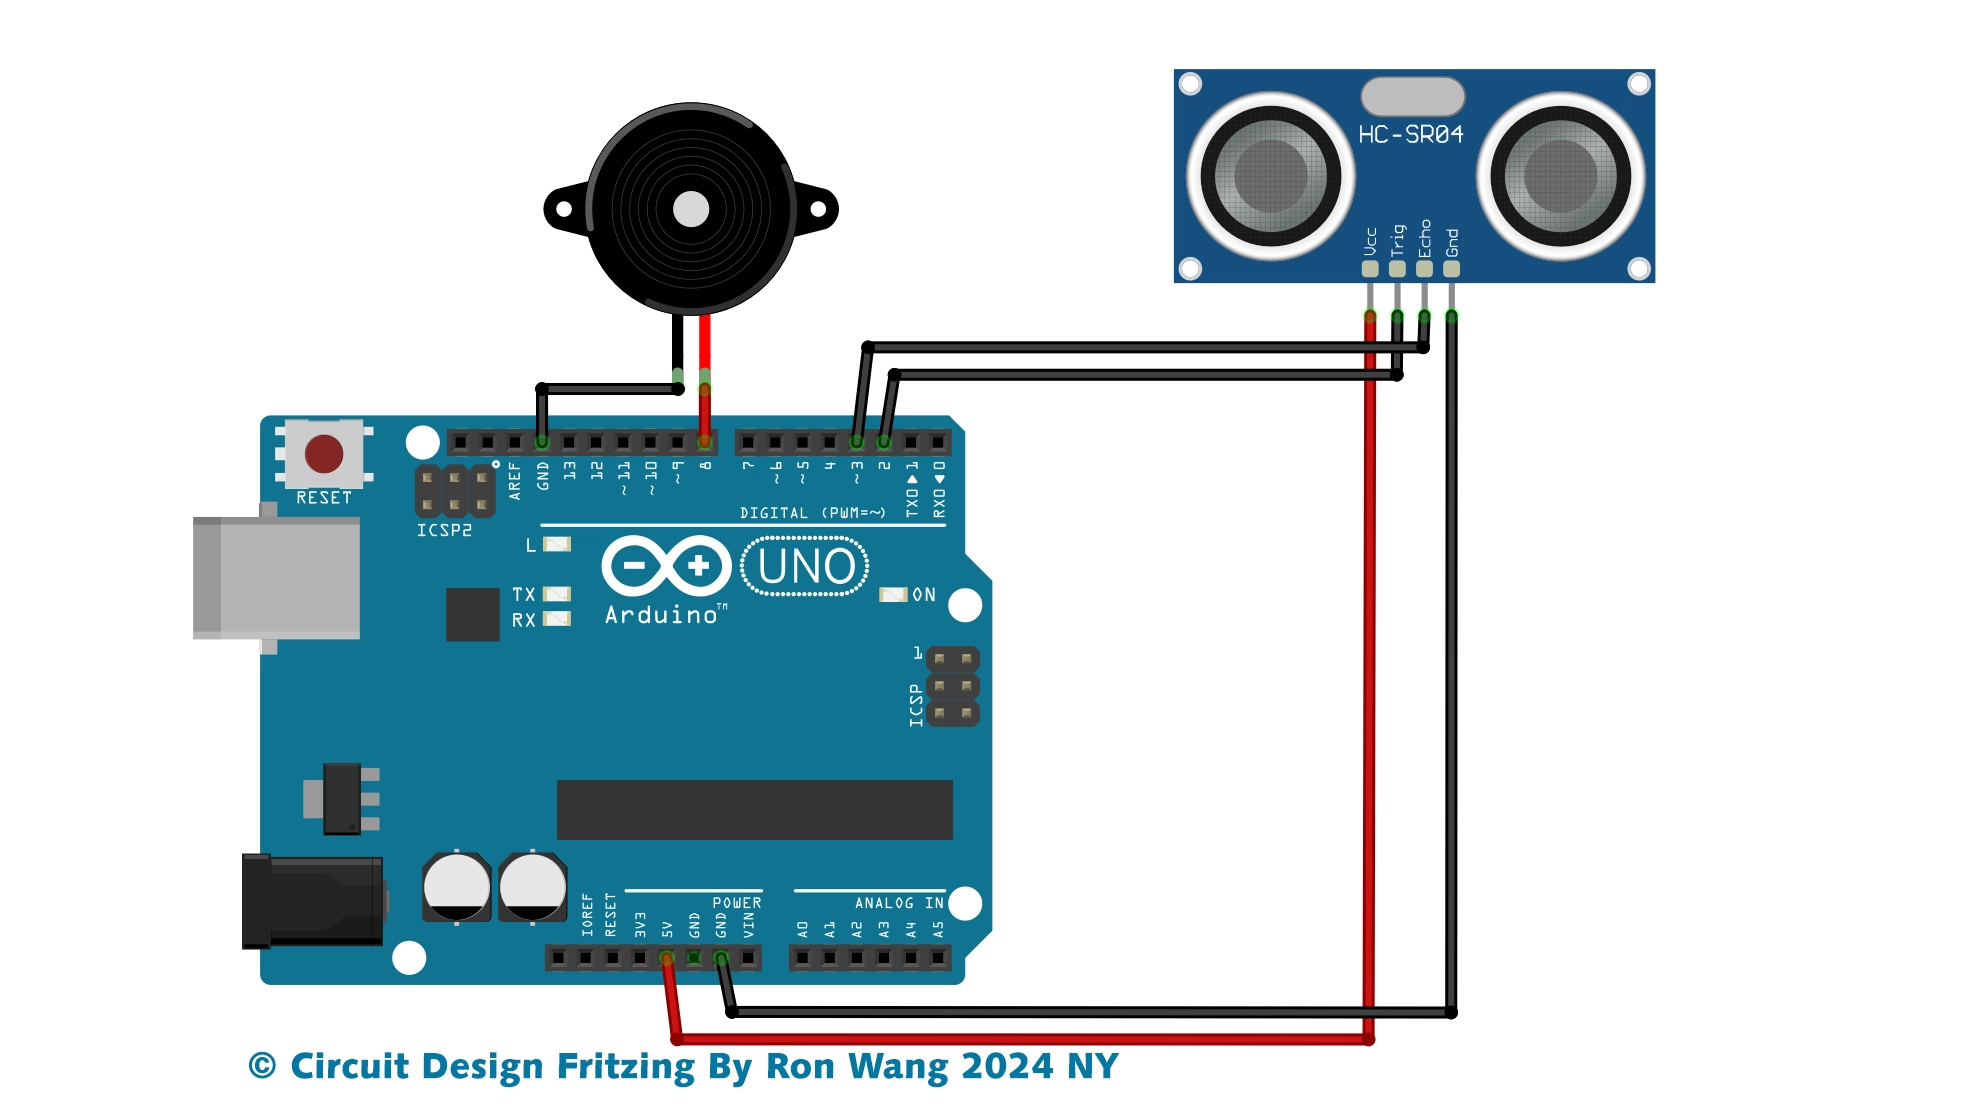
Connect Arudino and Sensor Pinout
Connect pins 12,9,8,6 (D1- D4) from the display to pins 13,12,11,10 (respectively)of the Arduino.
Connect pins 11,7,4,2,1,10,5,3 (a,b,c,d,e,f,g) of the display to pins 2,3,4,5,6,7,8,9 (respectively) of the Arduino with one 330Ω resistor in line.
On the ultrasonic sensor connect to VCC to 5V power pin, GND to the ground pin, the Trigger pin to A1 and Echo pin to A0.
/* Coding Ron Wang
   Dec.4th 2024
   Autaba support for coding hardware
   Project 39 Ultrasonic Distance Displays
 */

#include "SevSeg.h"  // library for 7 segment display
SevSeg sevseg;      // initate 7 segment display
                    //ultrasonic sensor pins globar variables
int trigPin = A1;
int echoPin = A0;
int cm;             // variable to be read by display
int interval;       //value from the trig and echo pins

void setup() {
Serial.begin (9600); // serial monotor comm rate
pinMode(trigPin, OUTPUT); // set to output
pinMode(echoPin, INPUT); // set to input
// set up SevSeg library parmeters
byte numDigits = 4; // number of digits on the display
byte digitPins[] = {13,12,11,10}; // pin numbers for each digit
byte segmentPins[] = {2,3,4,5,6,7,8,9}; // pins for each part of the 7 segment display
bool resistorsOnSegments = true;  // true if resistors are being used
bool updateWithDelaysIn = true;  // delays used
byte hardwareConfig = COMMON_ANODE;  // display type
sevseg.begin(hardwareConfig, numDigits, digitPins, segmentPins, resistorsOnSegments);
sevseg.setBrightness(20);   // brightness level of the display
}

void loop() {
digitalWrite(trigPin, LOW); // send short signal on the trigpin
delayMicroseconds(5);
digitalWrite(trigPin, HIGH); // send signal for 10ms
delayMicroseconds(10);
digitalWrite(trigPin, LOW); // turn off signal after 10ms
interval = pulseIn(echoPin, HIGH);
// read signal from trigpin
// determine distance by using the time from the trig and echo pins
// divide interval by 2 then divide again by 29
cm = (interval/2) / 29;
// print to serial monitor
Serial.print(cm);
Serial.print("cm");
Serial.println();
//print to 7 segment display
sevseg.setNumber(cm);
// print the value of cm to the display
sevseg.refreshDisplay();
}版权声明:本文为原创文章,版权归donstudio所有,欢迎分享本文,转载请保留出处!